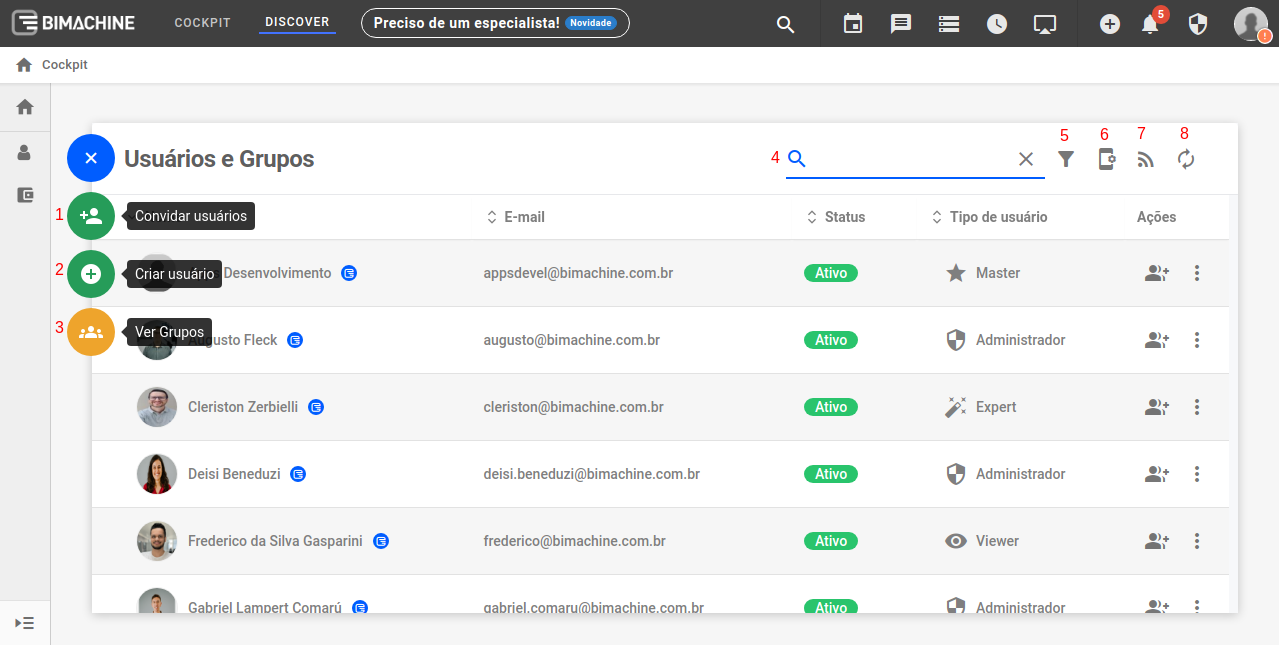
By accessing manage environment and clicking on "Users and Groups", a menu for managing user privileges and grouping will open. This article covers all actions that can be done to a user or group. The numbers indicated in the image below execute the following functions:

- Invite users: enter the email address of the user you want to add to the project and click "+" to add, the user will receive an email with an invitation to join the project.
- Create a user: choose an e-mail to create a new user in your project.
- View groups: view the groups that exist within your project, edit them, or create new ones.
- Search user: search for a specific user (by name or e-mail).
- Filter: filter by group, status and/or user type (master, administrator, expert and viewer).
- Mobile view configuration by user: in this menu you can define which users in the project will have access to the mobile version.
- View activities: see what activities each user has performed in your project.
- Refresh: update the user list.
Defining user type
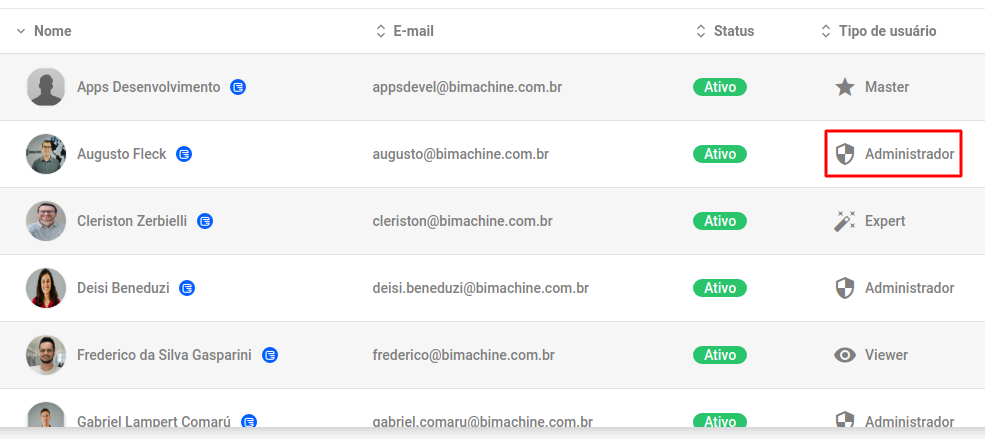
When the user is created, by default it becomes a Viewer, if you want to change it, click on the user type icon and select the appropriate user type (Viewer, Explorer, Expert, Administrator).

For more information about the user types in BIMachine, click here.
User management
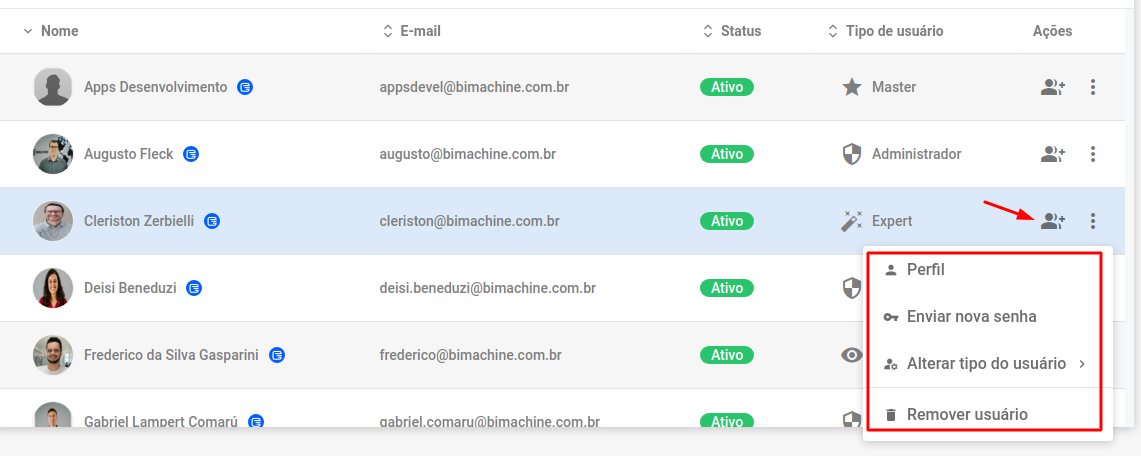
By clicking on  in the user actions column, the following menu will appear:
 in the user actions column, the following menu will appear:
Profile: user profile menu, containing the user’s information, recent activities, and also the user permissions tab.
Send new password: send a new password to the selected user.
Change user type: another way to perform the function explained above about changing the user type.
Remove user: delete the user from the project.
Add to a group : select a group for this user to join.
 select a group for this user to join.
